Instagram Stories are now one of the most popular ways to share daily life moments. People use Stories for almost everything — sharing photos, posting short videos, showing their work, giving tips, or even just saying hello. But in 2025, one feature has become very popular: adding voice notes to Instagram Stories.
A voice note makes your Story feel more personal. When someone hears your voice, they feel closer to you. Your voice carries emotions, feelings, and expressions that text or images cannot show. That is why many creators, influencers, small business owners, and even normal users are now using voice notes in their Stories.
In this full detailed guide, I will explain everything in simple words — how to add voice notes, how to use voice effects, how to use third-party apps, what to do if voice is not working, and extra professional tips to make your Stories look beautiful.
Why Voice Notes Are So Useful in 2025
Before learning the steps, let’s understand why voice notes are becoming a trend:
1. More Personal Touch
Text looks simple, but voice feels real.
When followers hear your voice, they feel like you are talking directly to them.
2. Easy to Explain Things
If you want to explain something — a recipe, a travel tip, a daily update, or a review — voice makes it much easier.
3. Emotional Connection
Your tone, your mood, your smile, your excitement — all come through voice.
4. Great for Creators and Businesses
Creators can connect better with fans.
Businesses can talk about offers, behind-the-scenes, or product details naturally.
5. Helpful for people who don’t want to show face
Some people are shy to appear on camera. Voice notes make it easy to share without showing face.
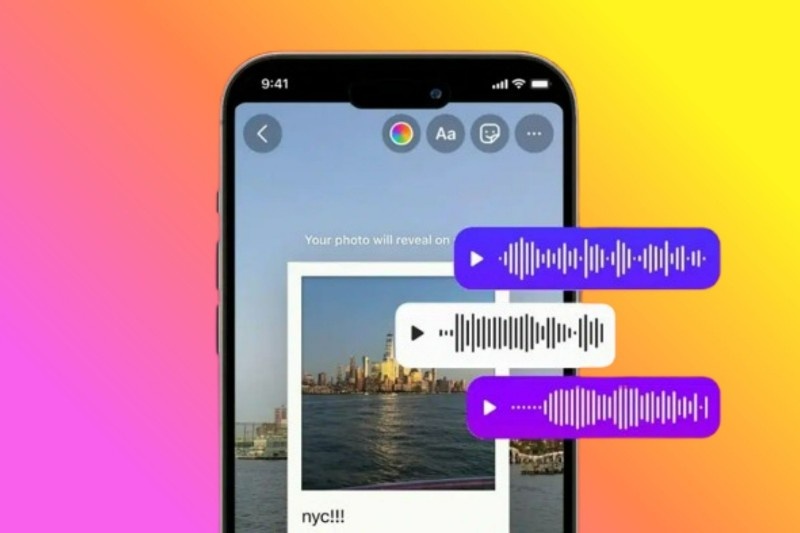
How to Add Voice Notes on Instagram Stories (Using Instagram’s Own Feature)
Instagram has a built-in microphone tool that allows you to record your voice directly inside the Story.
Follow these steps carefully:
Step 1: Open the Instagram Story Screen
- Open Instagram
- On the home screen, swipe right
- Or tap on “Your Story” circle at the top
Now you are inside the Story camera section.
tep 2: Capture or Choose a Background
You can:
- Take a photo
- Record a small video
- Or choose an image/video from your gallery
This is the background where your voice will play.
Step 3: Tap the Microphone Icon
You will see a microphone button on the side (depends on your version).
Press and hold the mic button to start recording.
- Talk slowly
- Keep the phone close
- Speak clearly
Release the button when you are done. Your voice note will now appear on the Story.
Step 4: Add Voice Effects to Make It Attractive
Instagram has many voice filters like:
- Deep Voice – perfect for a serious or bold sound
- Helium Voice – funny and high-pitched
- Robot – tech-style robotic sound
- Giant – adds a big, echo-type voice
- Smooth – soft and warm tone
- Musical – adds a small music effect
You can tap on each filter and check how it sounds. These filters make your Story more fun and engaging.
Step 5: Add Background Music (Optional)
If you want, you can add a song along with your voice. This creates a very professional output. If everything looks good, click Share to Story. Your followers will now hear your voice when they open your Story.
Steps:
- Tap the Music sticker
- Search for a song
- Choose the best part of the music
- Adjust the volume so that your voice is louder than the music
Step 6: Preview Your Story
Before sharing, always check:
- Is your voice clear?
- Is the music too loud?
- Is the background correct?
- Are there no mistakes?
How to Add Voice Notes Using External Apps (More Editing, Better Quality)
Instagram’s built-in feature is simple, but it has limitations. If you want: Cleaner voice, Noise removal, Voice mixing, Professional editing, More filters, Volume control, Then you can use external apps.
Some good apps are: CapCut, InShot, VN Video Editor, Lexis Audio Editor, WaveEditor, GarageBand (iPhone)
These apps allow you to create a more professional voice-over.
Record Your Voice in the App
Open the app → Tap Record → Speak your message → Save it.
You can also remove noise or edit the sound. Add Your Voice to a Video or Photo, Import your Story content into the app. Place your voice note on the audio timeline. Adjust timing so the voice matches the visuals.
Export and Upload
Save the final video → Open Instagram → Upload to Story.
This method gives the best quality.
Common Problems and Simple Fixes
Sometimes voice notes don’t work perfectly. Here are simple fixes:
1: Voice Is Too Low
Solution:
- Increase volume from phone settings
- Move closer to the mic
- Record in a quiet room
2: Voice Filters Not Available
Solution:
- Update your Instagram app
- Clear app cache
- Install again if needed
Some filters are region-based.
3: Background Noise
Use apps like CapCut to remove noise.
Or record in a quiet place.
Music Is Louder Than Voice
Lower the music volume using the Instagram music tool.
Voice Not Playing After Upload
If this happens:
- Restart phone
- Clear Instagram cache
- Try again
Extra Expert Tips to Make Professional Stories
These tips will make your Stories look better than others:
1. Use Short Voice Notes
People prefer short, fast information.
Try 5–12 seconds.
2. Add Small Text or Emojis
This makes your Story more colourful.
3. Use Consistent Style
Use same color, font, or filter.
This builds your “Instagram identity”.
4. Add Stickers for More Engagement
- Poll
- Question box
- Slider
- Link sticker
This gets more reactions.
5. Improve Voice Recording
Try these: Avoid fan noise, Do not cover the mic, Keep the phone close, Speak naturally, not too fast
6. Use Light Background Music
Soft background music creates mood without ruining the voice.
The End Note
Voice notes on Instagram Stories are one of the easiest and most powerful ways to make your content feel natural and real. In 2025, this feature is becoming very popular because people want more human-style content, not overly edited videos.
With voice notes, you can tell stories, share tips, explain products, talk to followers, or share your emotions. And you can do all of this without needing expensive equipment or editing skills.
Just record your voice, add effects if you want, preview your Story, and share it with your audience. With simple practice, you can make your Stories look professional and engaging.


